Unique Indian Recipes
Home/Recipes
microblog image

Shop the Ingredients


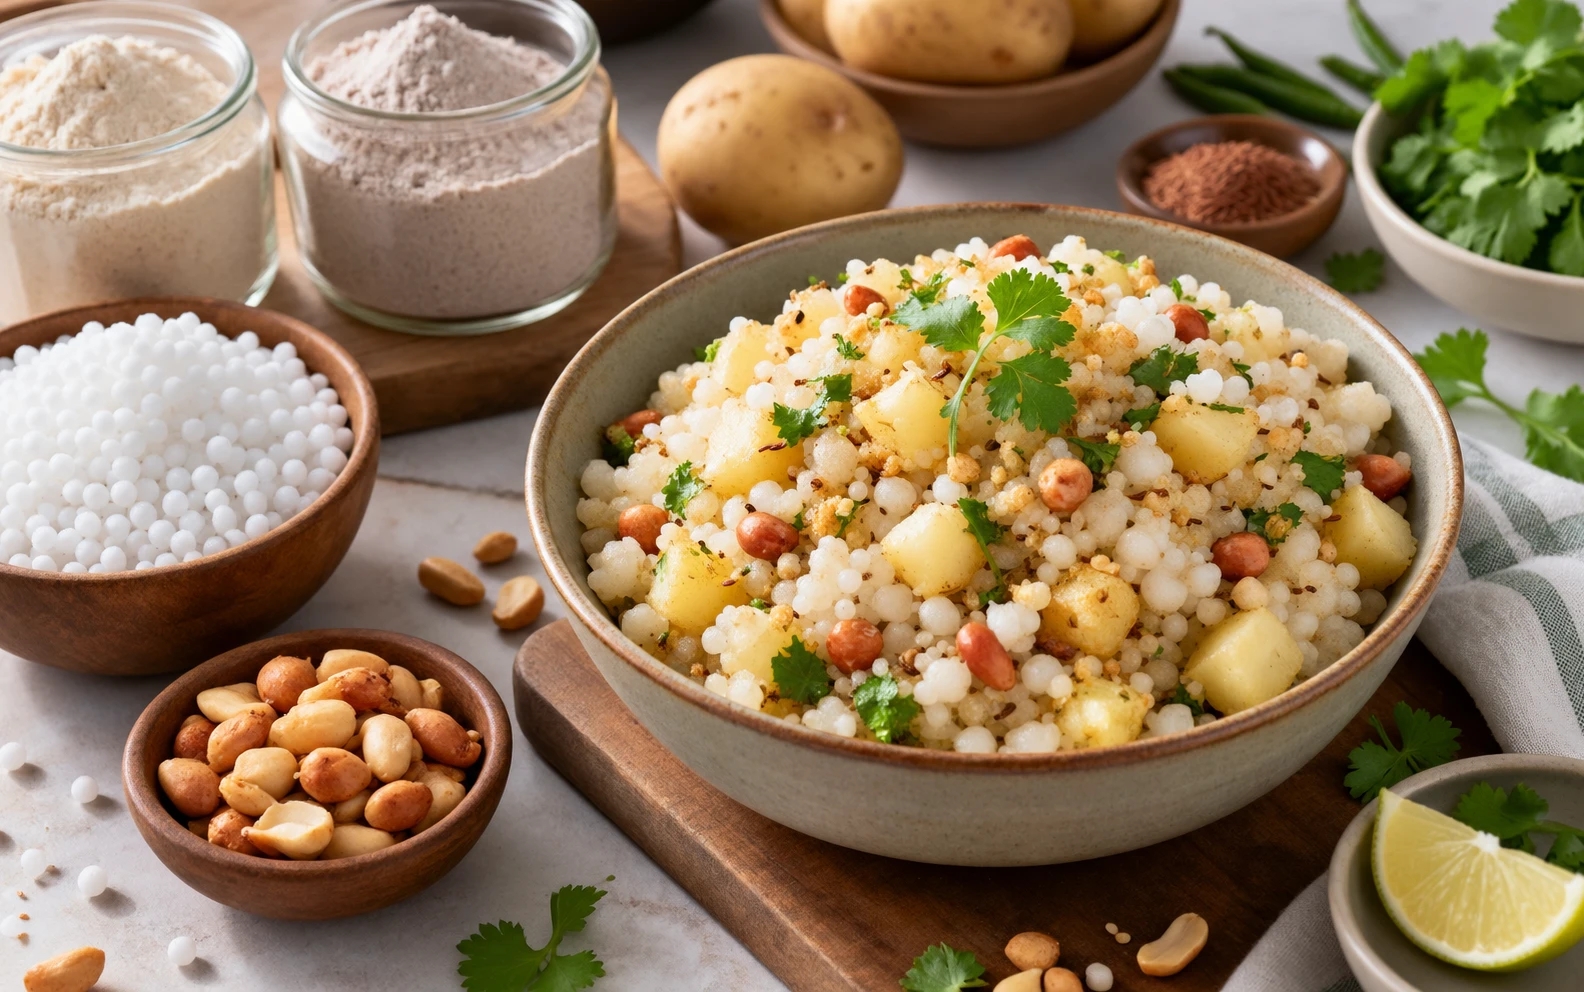
The main ingredients for this recipe are sabudana, potatoes and peanuts, along with the seasonings your household permits during Navratri. This recipe complements our September Navratri to Festive Season Grocery Buying Guide, which explains how sabudana, singhare ka atta and kuttu flour can be planned into a practical fasting pantry.


About This Recipe


Sabudana khichdi is one of the best-known dishes associated with fasting menus in many Indian households. Its ingredient list looks straightforward, yet getting the texture right can take practice. The challenge is usually not complicated seasoning. It is preparing the sabudana correctly so that the pearls cook without turning into one sticky mass.


The secret begins hours before the pan goes on the stove: proper soaking. Because Navratri fasting traditions vary significantly between families, use only ingredients and seasonings permitted according to your household's practice.


  • Preparation Time: About 15 minutes, plus soaking
  • Cooking Time: About 15–20 minutes
  • Total Active Time: About 30–35 minutes
  • Serves: Approximately 2–3


Ingredients


  • 1 cup sabudana
  • 1 medium potato, peeled and diced
  • ½ cup roasted peanuts
  • 1–2 green chillies, finely chopped, optional
  • 1 teaspoon cumin seeds, if permitted in your vrat practice
  • 1–2 tablespoons ghee or cooking fat permitted by your household
  • Sendha namak (rock salt), to taste, if used in your fasting tradition
  • 1 teaspoon lemon juice, or according to taste
  • Fresh coriander for garnish, if permitted and desired


Note: Navratri fasting rules vary. Adjust or omit seasonings according to the practices followed in your household.


Step 1: Rinse the Sabudana


Place the sabudana in a bowl. Rinse it gently with water several times to remove excess surface starch. Drain thoroughly. This step is important because excess starch can contribute to an overly sticky finished khichdi.


Step 2: Soak Carefully


After rinsing and draining, add enough water to hydrate the sabudana according to the type you are using and the preparation method you trust. Different sabudana sizes can hydrate differently, so there is no advantage in blindly adding a large amount of water. The goal is hydrated pearls rather than sabudana swimming in water.


Allow it to soak until the pearls become soft enough for the recipe. Many cooks prepare the sabudana several hours ahead or leave it to hydrate overnight, depending on the product and their preferred technique. Before cooking, test a pearl between your fingers. It should yield rather than remain hard in the center. If excess water remains, drain it thoroughly.


Step 3: Prepare the Peanuts


If your peanuts are not already roasted, roast them according to your usual method and let them cool. Crush them coarsely. Avoid turning all of the peanuts into a very fine powder. Some texture works well in sabudana khichdi. Mixing some crushed peanut with the soaked sabudana can also help keep the pearls separated while adding a nutty flavor throughout the dish.


Step 4: Cook the Potato


Heat the ghee or permitted cooking fat in a pan. If your fasting practice allows cumin seeds, add them and let them become aromatic. Add the chopped green chilli if using.

Next, add the diced potato. Cook over medium heat, stirring periodically, until the potato pieces are cooked through and lightly golden in places. Cutting the potato into small, relatively even pieces helps them cook at approximately the same rate.


Step 5: Add the Sabudana


Lower the heat slightly and add the soaked, drained sabudana along with the crushed peanuts. Add sendha namak according to your household's fasting practice. Mix gently.

You do not need to stir continuously and aggressively. Excessive stirring can break down the pearls and encourage them to become sticky. Cook until the sabudana turns more translucent and is heated through. Remove from the heat once it reaches the desired texture rather than continuing to cook unnecessarily.


Step 6: Finish the Khichdi


Add lemon juice according to taste. If coriander is part of your family's fasting menu, garnish with a small amount before serving. Taste and adjust only with ingredients allowed by your family's vrat rules. Serve warm.


Why Does Sabudana Khichdi Become Sticky?


This is probably the most common sabudana question. Several factors can contribute.


Too Much Soaking Water

Sabudana needs hydration, but soaking it in excessive water can leave the pearls overly wet. Use a method appropriate to the sabudana you have and drain excess water before cooking.


Insufficient Rinsing

Surface starch can encourage sticking. Rinsing before soaking helps remove some of that excess starch.


Overcooking

Once the sabudana is ready, continuing to cook it for too long can negatively affect the texture. Watch the pearls rather than simply relying on a long cooking time.


Too Much Stirring

Gentle mixing is enough. Constantly pressing and stirring the sabudana can make the finished dish heavier and stickier.


Why Are My Sabudana Pearls Still Hard?


Hard centers usually indicate that the sabudana has not hydrated sufficiently. This is why checking the pearls before cooking matters. Rather than discovering the problem after adding them to the pan, test one after soaking. If the center remains firm, your particular sabudana may require additional hydration time. Follow package instructions where available because pearl size and processing can vary.


Why Peanuts Work So Well Here


Peanuts add both flavor and texture to the relatively mild sabudana. Coarsely crushed roasted peanuts distribute throughout the khichdi while still giving the dish a pleasant bite.

They also complement the soft potato. However, if you are preparing the dish for guests, always check for peanut allergies and dietary restrictions rather than assuming everyone can eat them.


Preparing Sabudana Khichdi on a Busy Navratri Morning


The most useful time-saving step happens the previous evening. Rinse and begin hydrating the sabudana according to your preferred method so that it is ready when you need it. You can also make sure the peanuts and other permitted ingredients are organized in advance.


Then, when it is time to cook, most of your active preparation involves the potato and bringing the ingredients together. This makes sabudana khichdi particularly practical for households balancing Navratri observance with work or school schedules.


Adjust the Recipe to Your Family's Vrat Rules


There is no single fasting rule followed by every Navratri-observing household. Some families use ingredients that others avoid. Even seasonings considered normal in one household may not appear in another family's fasting kitchen. For this reason, treat the recipe as a cooking framework.


Keep the sabudana preparation technique, potatoes and peanuts where appropriate, but adapt the seasoning to your own religious and family practices. When cooking for someone else who is fasting, ask about their restrictions before preparing the meal.


How This Recipe Fits a Festive Grocery Plan


Sabudana is a good example of why festival shopping should start with recipes. Buying a packet because "Navratri is coming" does not tell you how much you need. Instead, decide how many times your household expects to prepare sabudana dishes and how many people you will serve.


Do the same for kuttu flour and singhare ka atta if those ingredients feature in other fasting meals. You can then purchase quantities that correspond to your actual Navratri menu rather than filling the pantry with specialty ingredients that may remain unused. That is exactly the recipe-first approach recommended in our September festive grocery guide.


Tap / Click to flip

Serve Fresh and Keep It Simple


Sabudana khichdi does not need an elaborate presentation. Its appeal comes from contrasting textures: soft tapioca pearls, tender potato and roasted peanuts, finished with the seasonings your fasting practice allows. Serve it warm and freshly prepared for the most enjoyable texture. If you're making it for the first time, practice once before preparing a larger quantity for family or guests. Sabudana becomes much easier to handle once you understand how the particular product in your pantry hydrates.


Shopping for Navratri Ingredients in Manteca


Families preparing for Navratri in Manteca, CA can make grocery shopping easier by separating their list into individual recipes. For this dish, focus first on sabudana, potatoes and peanuts, followed by the permitted seasonings required by your household. Then create separate lists for any kuttu-flour or singhare-ka-atta recipes you plan to prepare during the fasting period.


Raunak Bazar can be included in your Manteca festival grocery planning. For specific products, confirm availability before making a dedicated trip. With the sabudana soaked, ingredients organized and your family's vrat traditions in mind, this simple khichdi can become an easy and familiar addition to your Navratri menu.
← Tap / Click to go back
microblog image

Shop the Ingredients


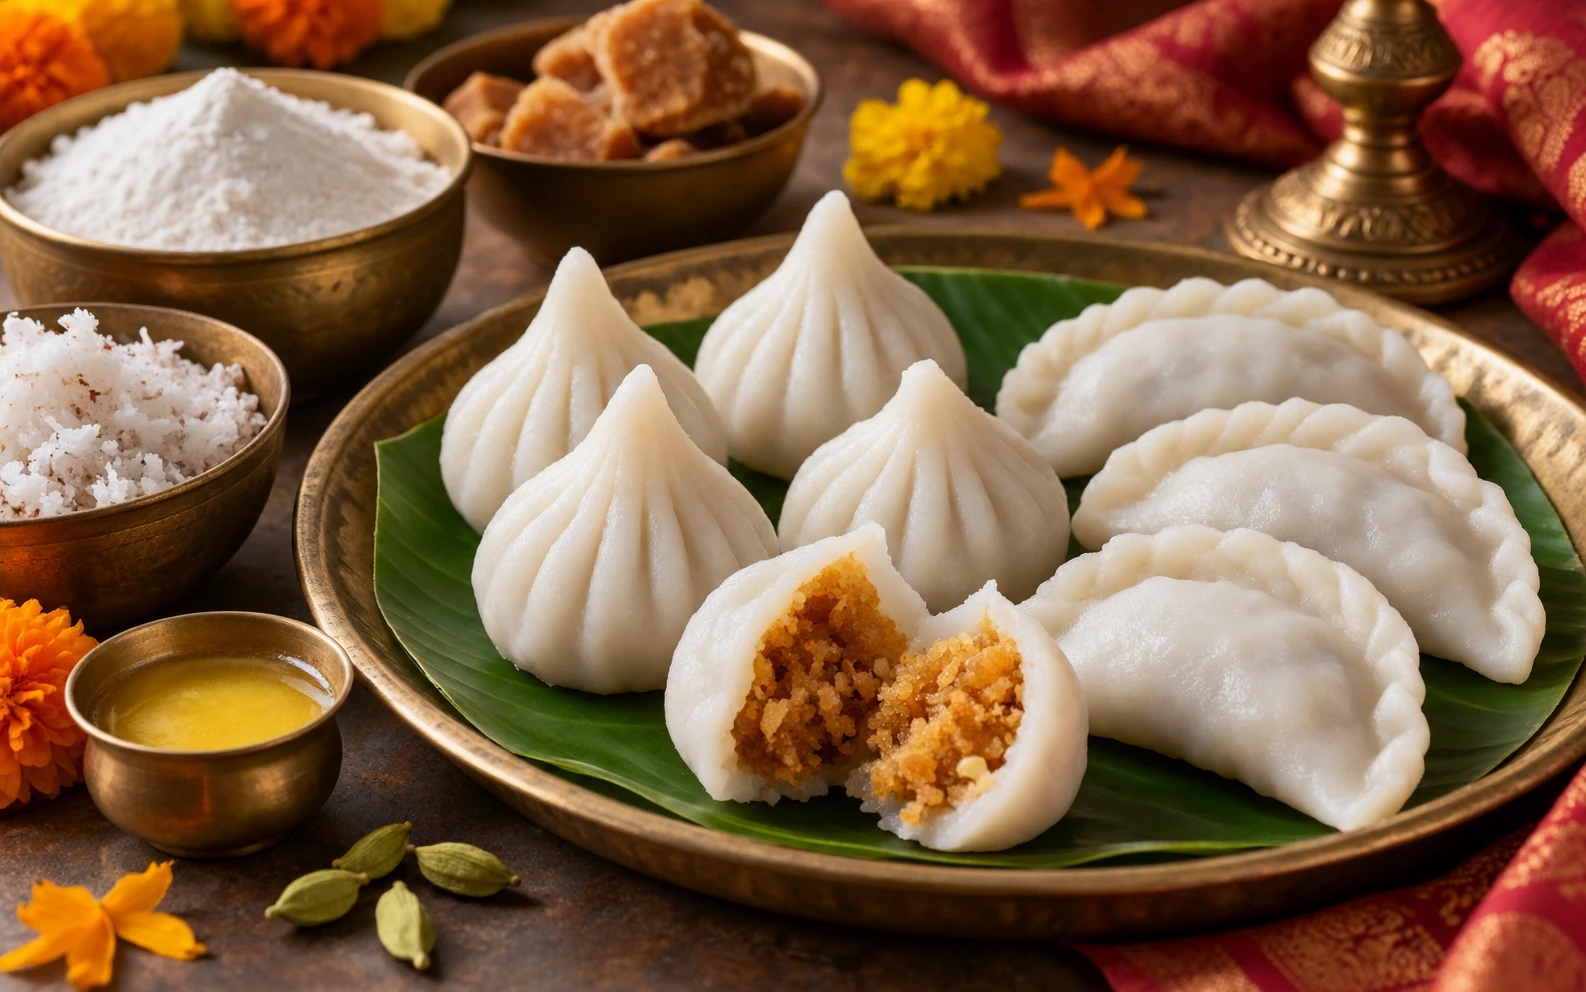
Before you begin, check your pantry for the three stars of this recipe: rice flour, coconut and jaggery. You will also need cardamom, a little ghee and water. This recipe pairs naturally with our September Ganesh & Vinayaka Chaturthi Food Guide, where we explain how these ingredients are used across modak and kozhukattai traditions.


About This Recipe


Ganesh Chaturthi and Vinayaka Chaturthi are celebrated through many regional food traditions. Maharashtrian-style steamed modak and Tamil-style sweet kozhukattai have their own identities, shapes and household variations, but many versions share a delicious combination: a tender rice-flour exterior filled with coconut and jaggery.


That shared foundation makes this a useful festival recipe for families who want to understand both preparations. The filling is sweet, coconut-rich and lightly scented with cardamom. The outer covering is made from rice flour and steamed rather than fried.


Most importantly, don't worry if your first few pieces are not perfectly shaped. A neat seal matters more than flawless pleats.


  • Preparation Time: About 30 minutes
  • Cooking Time: About 25 minutes
  • Total Time: About 55 minutes
  • Makes: Approximately 10–12 pieces


Ingredients


For the Coconut-Jaggery Filling

  • 1 cup grated coconut
  • ¾ cup grated or finely chopped jaggery
  • ½ teaspoon ground cardamom
  • 1 teaspoon ghee


For the Rice-Flour Dough

  • 1 cup rice flour
  • About 1¼ cups water, or as needed
  • 1 teaspoon ghee
  • A small pinch of salt, optional according to family preference


Step 1: Prepare the Coconut-Jaggery Filling


Begin with the filling so it has time to cool before you start shaping. Heat a pan over low to medium heat and add the ghee. Add the coconut and gently stir for a short time. Add the jaggery. As the jaggery warms, it will begin to soften and combine with the coconut. Keep the heat controlled and stir regularly so the mixture cooks evenly.


Continue cooking until the filling comes together and excess moisture reduces. You want it moist and cohesive, but not so wet that it leaks from the rice-flour covering. Add the cardamom and mix well. Remove the pan from the heat and allow the filling to cool completely.


Important: Avoid overcooking the mixture until it becomes excessively hard. The filling should remain pleasant and easy to portion once cooled.


Step 2: Prepare the Rice-Flour Dough


Bring the water to a boil in a saucepan. Add the ghee and, if used in your household recipe, a small pinch of salt. Reduce the heat and gradually add the rice flour while stirring.

Mix until the flour absorbs the water and begins forming a dough. Turn off the heat, cover the pan and allow the mixture to rest briefly until it becomes cool enough to handle safely but is still warm.


Transfer the dough to a plate or bowl. With lightly greased or damp hands, knead the warm dough until it becomes smooth and workable. If the dough feels too dry and cracks immediately when shaped, work in a very small amount of warm water. Add it gradually rather than pouring in too much at once. The finished dough should be soft enough to shape without falling apart.


Step 3: Divide the Dough and Filling


Divide the dough into approximately 10–12 equal portions. Roll each portion gently into a smooth ball. Divide the cooled coconut-jaggery mixture into roughly the same number of portions. Doing this before shaping helps prevent the first few pieces from being overfilled and the final ones from having too little filling. Keep unused dough covered while working so that it does not dry out.


Step 4: Shape Them as Modaks


For a modak-style shape, take one dough ball and flatten it gently. Using your fingers, work it into a small cup. Try to keep the covering reasonably even, especially around the edges. Place a portion of coconut-jaggery filling in the center. Carefully create small pleats around the outer edge. Bring the pleats toward the center and pinch them together at the top to create the familiar modak shape.


The exact number of pleats is not important for a home recipe. What matters most is ensuring that the filling is enclosed and the top is properly sealed. Repeat with the remaining dough.


Or Shape Them as Sweet Kozhukattai


For a simpler kozhukattai-style shape, flatten a dough ball into a small disc. Place the coconut-jaggery filling in the center. Fold the dough over the filling to create a half-moon shape and carefully press the edges together. Make sure the seam is properly sealed so the filling stays inside during steaming. Different households have their own preferred kozhukattai shapes and techniques, so follow your family's method if it differs.


Step 5: Steam


Prepare your steamer according to its instructions. Lightly grease the steaming surface if necessary and arrange the shaped pieces with a little room between them. Steam until the rice-flour covering is cooked through. Depending on size and steaming setup, this generally takes around 10–12 minutes. The exterior will become slightly more translucent-looking when cooked. Remove carefully and allow the pieces to rest briefly before handling.


Why Does Rice-Flour Dough Crack?


Cracking is one of the most common problems when making steamed modaks or kozhukattai. Usually, the dough has become too dry, has cooled too much before shaping, or needs a little more kneading. Keep the dough covered while you work. If a portion feels dry, knead it gently with slightly damp hands. Avoid adding a large amount of water because overly wet dough can become difficult to shape. Working while the dough remains comfortably warm generally makes shaping easier.


Why Does the Filling Leak?


There are two common reasons. First, the coconut-jaggery mixture may contain too much moisture. Allow it to cook until it comes together rather than remaining loose or watery. Second, the outer covering may be too thin or improperly sealed. Beginners should prioritize a secure covering over an ultra-thin shell. As your shaping technique improves, you can gradually make the exterior more delicate.


Modak or Kozhukattai: Which Shape Should You Make?


Make whichever reflects your family's tradition or make both. The purpose of this recipe is not to suggest that modak and kozhukattai are identical. Rather, it demonstrates how closely related ingredients can become distinct regional festival preparations. If children are joining the cooking session, the simpler half-moon shape may also be easier for them to help form under adult supervision. Experienced family members can handle the traditional modak pleating.


A Useful Festival Preparation Tip


Make the filling before preparing the dough. The coconut-jaggery mixture needs time to cool, while rice-flour dough is generally easier to shape while still warm and pliable. Reversing that order can leave you waiting for hot filling while your dough begins drying. That small change in workflow can make festival cooking considerably smoother.


Tap / Click to flip

Serving


Serve the steamed modak or kozhukattai according to your family's festival tradition.

Because the filling already contains coconut and jaggery, the finished sweet has plenty of flavor without requiring an elaborate accompaniment. For the best experience, enjoy the texture while the preparation is fresh and tender.


Bringing Regional Traditions Together


This recipe is particularly meaningful for families whose celebrations bring together people from different parts of India. One person may know these flavors through Maharashtrian modak. Another may immediately associate a coconut-jaggery-filled rice preparation with Tamil Vinayaka Chaturthi traditions   the kind of quiet cultural bridge-building an Indian grocery store often becomes part of.


The shared ingredients create an opportunity to discuss those differences rather than erase them. Make one batch in the modak shape and another as kozhukattai. Ask parents or grandparents how their families traditionally prepared them. Record the small differences in filling, dough and shaping. Those details can become part of the recipe your family passes forward.


Shop for Your Festival Ingredients in Manteca


If you're preparing Ganesh or Vinayaka Chaturthi recipes in Manteca, CA, make a recipe-specific shopping list before heading to Raunak Bazar. Start with rice flour, coconut and jaggery, then check whether you already have cardamom and ghee at home.


Because specific inventory can vary, confirm availability when you need a particular ingredient. With your ingredients organized beforehand, you can spend festival day shaping, steaming and sharing the recipe rather than making last-minute grocery runs.

← Tap / Click to go back
microblog image

A Colorful, Crunchy and Flavor-Packed Indian Snack


Chaat is all about contrast warm and cool, crunchy and creamy, sweet and tangy, fresh and spicy. These Tandoori Masala Sweet Potato & Chickpea Chaat Cups take that idea in a different direction by combining roasted sweet potatoes and chickpeas with tandoori-inspired spices, cooling yogurt, fresh vegetables, chutneys, and crunchy sev.


The mixture is served in small edible tortilla or roti cups, making the recipe ideal for parties, family gatherings, game nights, or an impressive weekend snack. Each person gets an individual serving filled with layers of Indian flavor.


Prep Time

20 minutes


Cook Time

30 minutes


Total Time

50 minutes


Servings

6


Ingredients


For the Tandoori Sweet Potato and Chickpeas


  • 2 medium sweet potatoes, peeled and cut into small cubes
  • 1½ cups cooked chickpeas, drained well
  • 2 tablespoons thick yogurt
  • 1 tablespoon oil
  • 1 teaspoon tandoori masala
  • ½ teaspoon roasted cumin powder
  • ½ teaspoon Kashmiri red chili powder
  • ¼ teaspoon turmeric
  • ½ teaspoon chaat masala
  • 1 teaspoon lemon juice
  • Salt to taste


For the Chaat Cups


  • 6 medium whole-wheat rotis or tortillas
  • A small amount of oil for brushing


For the Toppings


  • ¾ cup plain yogurt, whisked until smooth
  • ½ cup finely chopped cucumber
  • ½ cup finely chopped tomato
  • ¼ cup finely chopped red onion
  • ¼ cup fresh cilantro, chopped
  • 2 tablespoons fresh mint, chopped
  • Mint-coriander chutney, as needed
  • Tamarind-date chutney, as needed
  • ½ cup thin sev
  • ½ teaspoon chaat masala
  • ½ teaspoon roasted cumin powder
  • Pomegranate arils, optional
  • Fresh lemon wedges


Instructions


Step 1: Prepare the Sweet Potatoes


Preheat the oven to 425°F. Place the cubed sweet potatoes in a mixing bowl. Add yogurt, oil, tandoori masala, roasted cumin, Kashmiri chili powder, turmeric, chaat masala, lemon juice, and salt. Mix until every piece is evenly coated.


Step 2: Season the Chickpeas


Pat the cooked chickpeas dry with a clean kitchen towel. Add them to the same bowl and gently mix with the seasoned sweet potatoes. Drying the chickpeas helps them roast more effectively instead of steaming in excess moisture.


Step 3: Roast the Mixture


Spread the sweet potato and chickpea mixture on a parchment-lined baking sheet in a single layer. Roast for approximately 25–30 minutes, turning once halfway through. The sweet potatoes should be tender with lightly browned edges, while the chickpeas should develop a slightly firmer exterior. Remove from the oven and allow the mixture to cool for several minutes.


Step 4: Make the Edible Cups


Lightly brush both sides of the rotis or tortillas with oil. Cut each one into a circle sized appropriately for a muffin pan if necessary. Press each piece gently into a muffin cup, allowing the edges to rise above the pan. Bake at 375°F for approximately 8–12 minutes, or until crisp and lightly golden. Watch carefully toward the end because thin breads can brown quickly. Remove the pan from the oven and let the cups cool before carefully lifting them out.


Step 5: Prepare the Fresh Toppings


While the cups cool, chop the cucumber, tomato, red onion, cilantro, and mint. Whisk the yogurt until smooth. Keep the sev separate until the final moment so it remains crisp.


Step 6: Assemble the Chaat Cups


Place a spoonful of roasted sweet potato and chickpeas into each crisp cup. Add a little chopped cucumber, tomato, and onion. Spoon yogurt over the top. Drizzle with mint-coriander chutney and tamarind-date chutney. Sprinkle with chaat masala and roasted cumin powder. Finish with sev, cilantro, mint, and optional pomegranate arils.


Step 7: Serve Immediately


Serve the chaat cups as soon as they are assembled. Offer extra chutneys and lemon wedges on the side so guests can customize the sweetness, heat, and tanginess.


The Secret to Great Chaat


  • Good chaat should not taste one-dimensional.
  • The sweet potatoes provide earthy sweetness.
  • Tandoori spices add warmth.
  • Chickpeas give the filling body.
  • Yogurt cools the spices.
  • Mint chutney contributes fresh heat.
  • Tamarind-date chutney brings sweetness and tang.
  • Onions and cucumber add freshness.
  • Sev supplies the final crunch.
  • Try to include a little of every layer in each cup.


Easy Variations


Extra-Spicy Chaat Cups


Add chopped green chili to the fresh toppings and use a spicy mint chutney.


Paneer Chaat Cups


Replace half the chickpeas with small cubes of roasted paneer.


Corn & Sweet Potato Version


Replace the chickpeas with roasted corn for a sweeter, lighter combination.


No-Cup Chaat Bowl


If you do not want to bake edible cups, simply assemble all the ingredients in individual bowls. The flavor remains delicious, and preparation becomes even faster.


Make-Ahead Tips


The roasted sweet potato and chickpea mixture can be prepared several hours ahead. The fresh vegetables can also be chopped in advance and refrigerated separately. Bake the cups earlier in the day and keep them in a dry airtight container after they cool completely.


Do not assemble the chaat too far ahead. Yogurt and chutneys will gradually soften the crisp cups. For the best result, arrange the components separately and assemble immediately before serving.

Tap / Click to flip

Perfect for Entertaining


This recipe works particularly well for gatherings because the individual cups are easy to serve and visually appealing. For a DIY chaat station, place the crispy cups, roasted filling, yogurt, chutneys, vegetables, sev, herbs, and seasonings in separate bowls. Guests can build their own combinations. It also lets people control how spicy, sweet, creamy, or crunchy they want their chaat.


Why You'll Love This Recipe


Tandoori Masala Sweet Potato & Chickpea Chaat Cups combine the excitement of Indian street-food flavors with ingredients that are easy to keep in a home kitchen. They are colorful, customizable, satisfying, and suitable for everything from an afternoon snack to a party appetizer.


The recipe also demonstrates how a few versatile Indian grocery staples chickpeas, yogurt, tandoori masala, chaat masala, chutneys, sev, fresh herbs, and vegetables can be transformed into something completely different from an everyday curry.


Visit Raunak Bazar for Indian spices, chickpeas, chutneys, yogurt, fresh produce, snack ingredients, and other grocery essentials, then bring all those sweet, spicy, tangy, creamy, and crunchy flavors together in one irresistible chaat cup.

← Tap / Click to go back
microblog image

A Crispy, Tangy Indian-Inspired Snack for Tea Time or Family Dinners


If you love the bold flavors of achari spices, creamy paneer, sweet corn, and warm Indian bread, these Achari Paneer & Corn Stuffed Kulcha Pockets bring them together in one satisfying recipe.


Instead of preparing a traditional paneer curry or wrap, this recipe turns the filling into crispy handheld pockets. They work beautifully as an evening snack, lunch-box option, party appetizer, or casual weekend meal.


The tangy achari seasoning contrasts with mild paneer and naturally sweet corn, while onions and bell peppers add texture. Serve the pockets with mint-yogurt chutney for a fresh finish.


Prep Time

20 minutes


Cook Time

25 minutes


Total Time

45 minutes


Servings

4


Ingredients


For the Achari Paneer Filling

  • 250 g paneer, crumbled or finely diced
  • ¾ cup sweet corn
  • 1 small onion, finely chopped
  • ½ cup bell pepper, finely chopped
  • 1 green chili, finely chopped
  • 1 teaspoon grated ginger
  • 1 tablespoon oil
  • ½ teaspoon cumin seeds
  • ½ teaspoon fennel seeds
  • ¼ teaspoon mustard seeds
  • ¼ teaspoon nigella seeds
  • ½ teaspoon turmeric powder
  • 1 teaspoon coriander powder
  • ½ teaspoon Kashmiri red chili powder
  • ½ teaspoon garam masala
  • ½ teaspoon amchur powder
  • 1 teaspoon lemon juice
  • Salt to taste
  • 2 tablespoons chopped fresh cilantro


For the Pockets

  • 4 plain kulchas
  • 1–2 teaspoons ghee or oil for toasting
  • 1 tablespoon flour mixed with a little water to make a sealing paste, if needed


For Mint-Yogurt Chutney

  • ¾ cup thick plain yogurt
  • ½ cup fresh mint leaves
  • ½ cup fresh cilantro
  • 1 small green chili
  • ½ teaspoon roasted cumin powder
  • 1 teaspoon lemon juice
  • Salt to taste


Instructions


Step 1: Prepare the Achari Tempering


Heat oil in a wide pan over medium heat. Add cumin seeds, fennel seeds, mustard seeds, and nigella seeds. Let the spices sizzle briefly until aromatic. Be careful not to burn them. Add grated ginger and green chili and sauté for approximately 30 seconds.


Step 2: Cook the Vegetables


Add chopped onion and bell pepper. Cook for 3–4 minutes. The vegetables should soften slightly while retaining some texture. Add sweet corn and stir for another 2 minutes.


Step 3: Add Paneer and Spices


Lower the heat and add turmeric, coriander powder, Kashmiri chili powder, garam masala, amchur, and salt. Stir quickly so the spices coat the vegetables without scorching. Add the crumbled paneer.


Mix gently and cook for 3–4 minutes. Finish with lemon juice and chopped cilantro. Remove the filling from the heat and allow it to cool. Cooling is important because very hot filling can make the kulcha difficult to handle.


Step 4: Prepare the Mint-Yogurt Chutney


Blend mint, cilantro, green chili, roasted cumin, lemon juice, and a small spoonful of yogurt until smooth. Transfer to a bowl and mix with the remaining yogurt. Season with salt. Refrigerate until serving.


Step 5: Form the Kulcha Pockets


Cut each kulcha in half. Carefully create a pocket in each half without tearing completely through the bread. Fill each pocket generously with the cooled achari paneer and corn mixture.


If necessary, use a tiny amount of flour paste near the open edge to help hold the pocket together. Do not overfill, as this can cause the bread to split during cooking.


Step 6: Toast Until Crisp


Heat a skillet or tawa over medium-low heat. Brush the outside of each pocket lightly with ghee or oil. Place the filled pockets on the pan and toast for approximately 2–3 minutes per side, pressing gently with a spatula. Continue until the outside is crisp and golden and the filling is heated through.


Step 7: Serve


Cut larger pockets diagonally if desired. Serve immediately with chilled mint-yogurt chutney, sliced onions, cucumber, and lemon wedges.


Optional Variations


Spicy Version

Add extra green chili and a pinch of crushed red chili flakes to the filling.


Extra-Vegetable Version

Mix in finely chopped spinach, grated carrot, or green peas.


Cheese Version

Add a small amount of grated mozzarella with the paneer before stuffing the pockets for an extra-melty center.


Kid-Friendly Version

Skip the green chili and reduce the achari spices slightly. Add extra sweet corn for a milder filling.


Serving Suggestions


These stuffed kulcha pockets can be served with:

  • Mint-coriander chutney
  • Tamarind chutney
  • Plain yogurt
  • Cucumber-onion salad
  • Masala chai
  • Mango lassi


For a more substantial dinner, pair them with a fresh salad and raita.


Tap / Click to flip

Storage and Reheating


The filling can be prepared one day in advance and stored in a covered container in the refrigerator. For the best texture, assemble and toast the kulcha pockets shortly before serving.


If you have leftover cooked pockets, refrigerate them in an airtight container and reheat them on a skillet or in an oven or air fryer until thoroughly heated and crisp again.


Why You'll Love This Recipe


These Achari Paneer & Corn Stuffed Kulcha Pockets deliver familiar Indian flavors in a fun format. The paneer makes the filling satisfying, corn adds sweetness, vegetables provide texture, and the achari-inspired spices create a tangy, aromatic kick.


Best of all, the recipe uses grocery ingredients that can easily become part of other meals throughout the week. Pick up paneer, kulcha, spices, fresh herbs, vegetables, yogurt, and other Indian grocery essentials at Raunak Bazar and turn your next tea time or family dinner into something deliciously different.
← Tap / Click to go back
microblog image

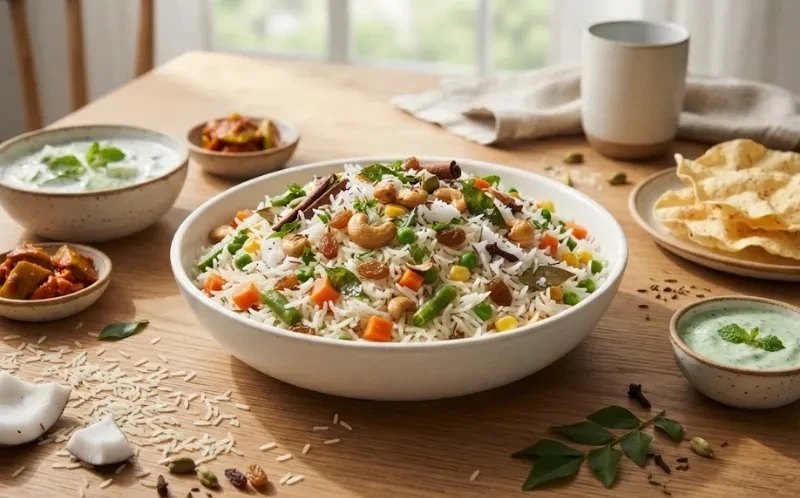
Coconut Vegetable Pulao with Cashew and Raisin Tadka


Prep Time

15 Minutes


Cook Time

30 Minutes


Total Time

45 Minutes


Servings

4–5


Introduction


Coconut Vegetable Pulao is a fragrant one-pot rice dish inspired by the fresh flavors of South India. Long-grain basmati rice is cooked with mixed vegetables, coconut milk, whole spices, roasted cashews, and sweet raisins to create a meal that's both elegant and comforting.


Perfect for family dinners, festive gatherings, or weekend meals, this recipe balances savory, mildly sweet, and aromatic flavors in every bite.


Fresh ingredients and premium-quality basmati rice available at Raunak Bazar make this recipe especially delicious.


Ingredients


  • 2 cups basmati rice
  • 2½ cups coconut milk
  • ½ cup water
  • 2 tablespoons ghee
  • 1 tablespoon cooking oil
  • 1 bay leaf
  • 4 green cardamom pods
  • 4 cloves
  • 1 cinnamon stick
  • 1 teaspoon cumin seeds
  • 10 curry leaves
  • 1 medium onion, thinly sliced
  • 1 teaspoon ginger-garlic paste
  • 1 cup mixed vegetables (carrots, peas, beans, corn)
  • ¼ cup roasted cashews
  • 2 tablespoons raisins
  • ½ teaspoon turmeric
  • Salt to taste
  • Fresh cilantro
  • Fresh grated coconut (optional)
Tap / Click to flip

Instructions


Wash the basmati rice thoroughly and soak it for twenty minutes. Drain well.


Heat ghee and oil in a heavy-bottomed pot.


Add bay leaf, cardamom, cloves, cinnamon, cumin seeds, and curry leaves. Sauté until fragrant.


Add sliced onions and cook until lightly golden.


Mix in ginger-garlic paste and cook for one minute.


Add mixed vegetables and turmeric. Cook for three to four minutes.


Add the drained rice and gently stir for two minutes to lightly toast the grains.

Pour in coconut milk and water. Add salt and stir once.


Cover the pot and cook over low heat until the rice becomes fluffy and fully cooked.


Meanwhile, lightly roast cashews and raisins in a teaspoon of ghee until the raisins puff up.


Fluff the cooked rice with a fork. Fold in roasted cashews, raisins, cilantro, and optional grated coconut.


Allow the pulao to rest for five minutes before serving.


Serving Suggestions


Serve with cucumber raita, vegetable kurma, pickle, papad, or a refreshing mint yogurt dip. It also pairs wonderfully with grilled paneer or vegetable kebabs.


Storage Tips


Refrigerate leftovers in an airtight container for up to three days. Sprinkle a little water before reheating to maintain the rice's soft texture.


Recipe Tips


  • Use aged basmati rice for fluffy grains.
  • Do not over-stir while cooking.
  • Fresh coconut milk provides richer flavor than canned alternatives.
  • Add paneer cubes or chickpeas for additional protein.
  • Garnish with fried onions for festive occasions.


Why You'll Love This Recipe


This aromatic pulao is simple enough for weekday dinners yet elegant enough for celebrations. The combination of coconut milk, whole spices, roasted cashews, and colorful vegetables creates a flavorful one-pot meal that's comforting, nutritious, and beautifully balanced. Using premium Indian pantry ingredients from Raunak Bazar ensures authentic taste in every serving.
← Tap / Click to go back
microblog image

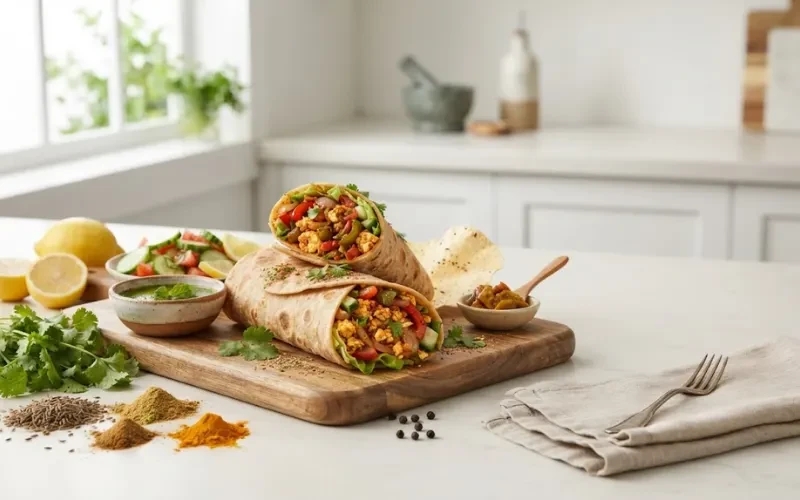
Paneer Bhurji Stuffed Whole Wheat Wraps


Prep Time

20 Minutes


Cook Time

15 Minutes


Total Time

35 Minutes


Servings

4


Introduction


Looking for a wholesome meal that's easy to prepare and packed with authentic Indian flavors? These Paneer Bhurji Stuffed Whole Wheat Wraps combine soft whole wheat rotis with a flavorful paneer filling loaded with fresh vegetables and aromatic spices. Perfect for breakfast, lunch, dinner, or lunchboxes, this recipe is nutritious, satisfying, and easy to customize with your favorite vegetables.


Most of the ingredients are pantry staples that can be found at Raunak Bazar, making this recipe convenient for busy weekdays while delivering comforting homemade flavors.


Ingredients


For the Filling

  • 2 tablespoons cooking oil
  • 1 teaspoon cumin seeds
  • 1 medium onion, finely chopped
  • 2 green chilies, finely chopped
  • 1 teaspoon ginger-garlic paste
  • 2 medium tomatoes, finely chopped
  • ½ cup finely diced bell peppers
  • 250 g fresh paneer, crumbled
  • ½ teaspoon turmeric powder
  • 1 teaspoon coriander powder
  • ½ teaspoon cumin powder
  • ½ teaspoon Kashmiri red chili powder
  • ½ teaspoon garam masala
  • Salt to taste
  • 2 tablespoons chopped cilantro
  • 1 teaspoon lemon juice


For the Wraps

  • 4 whole wheat rotis
  • Butter or ghee for lightly toasting
  • Sliced onions
  • Shredded lettuce
  • Thin cucumber slices
  • Mint chutney
Tap / Click to flip

Instructions


Heat oil in a large skillet over medium heat. Add cumin seeds and allow them to crackle.

Add onions and sauté until translucent. Stir in green chilies and ginger-garlic paste. Cook for another minute until fragrant.


Add tomatoes and cook until they become soft and the oil begins separating from the mixture.


Mix in bell peppers and cook for two minutes while keeping them slightly crisp.

Add turmeric, coriander powder, cumin powder, red chili powder, garam masala, and salt. Stir well.


Fold in the crumbled paneer and gently mix until all the spices coat the paneer evenly. Cook for four to five minutes.


Finish with fresh cilantro and lemon juice.


Warm the rotis on a skillet with a light brushing of butter or ghee.


Spread mint chutney over each roti, add lettuce, cucumber, onion slices, and a generous spoonful of paneer bhurji.


Roll tightly, slice in half if desired, and serve immediately.


Serving Suggestions


Serve with masala chai, fresh yogurt, mango pickle, or roasted papad. These wraps also pair beautifully with fresh fruit or a simple cucumber salad.


Storage Tips


Store leftover paneer bhurji in an airtight container in the refrigerator for up to two days. Reheat gently before assembling fresh wraps.


Why You'll Love This Recipe


This recipe is packed with protein, colorful vegetables, and authentic Indian spices. It's ideal for quick family dinners, office lunches, or school lunchboxes. Using fresh paneer and quality spices from Raunak Bazar brings restaurant-quality flavor to your home kitchen.
← Tap / Click to go back
microblog image

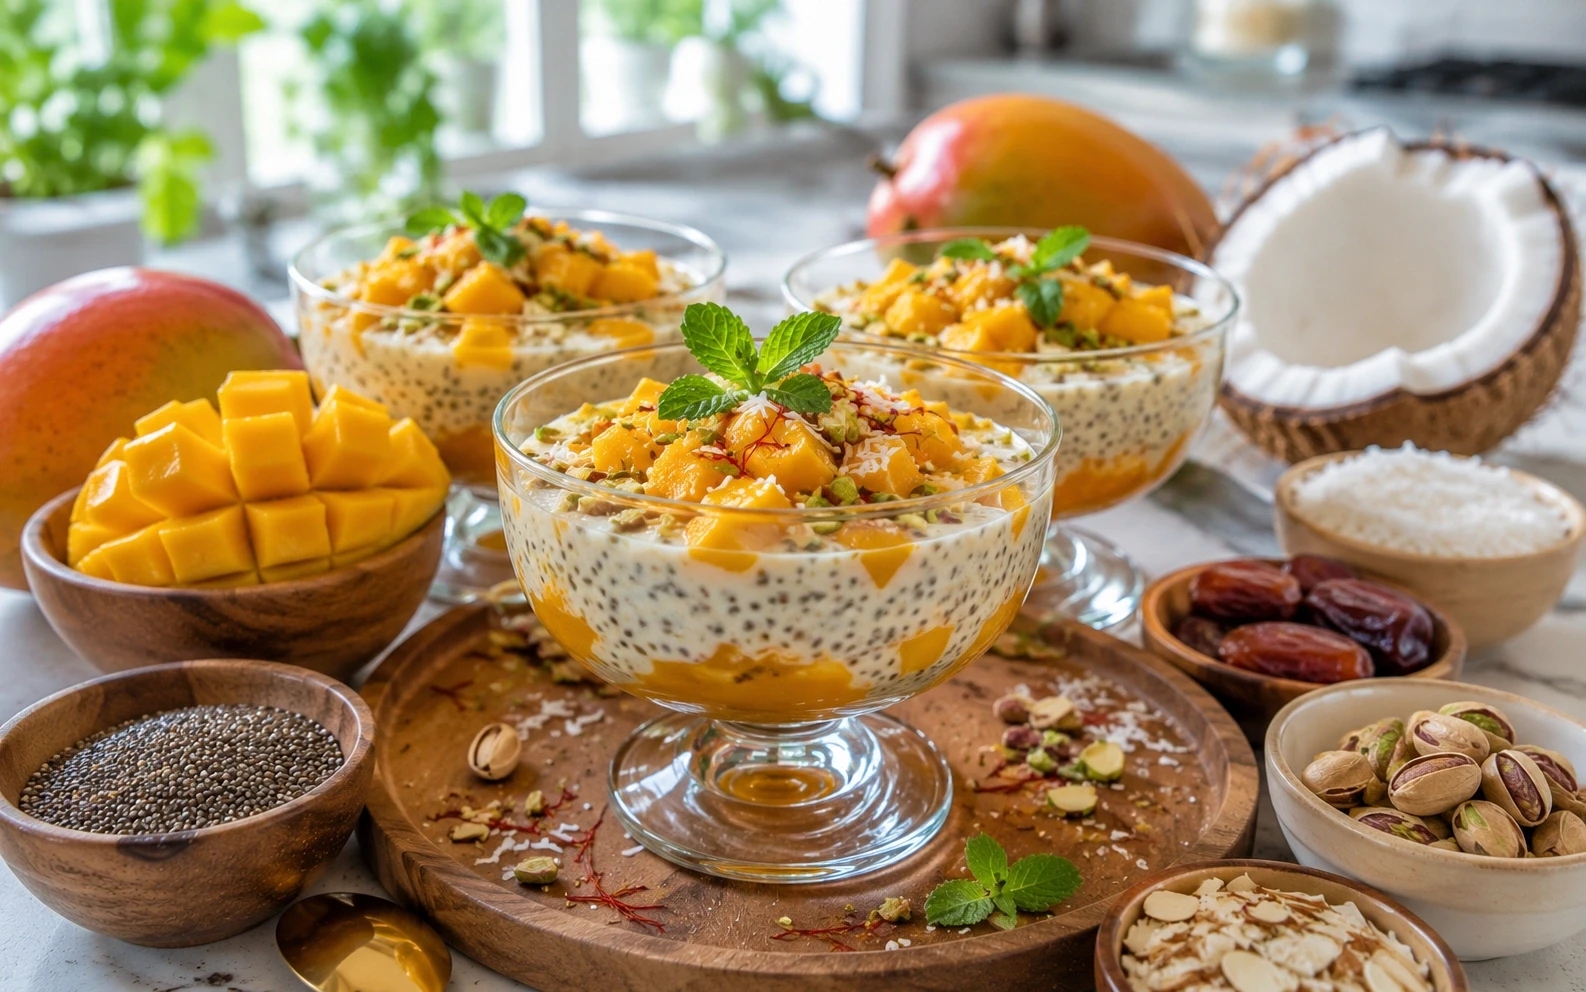
Mango Coconut Chia Kheer (No Refined Sugar)


A Refreshing Indian-Inspired Dessert Made with Natural Ingredients


Looking for a light, creamy dessert that combines traditional Indian flavors with modern nutrition? This Mango Coconut Chia Kheer is a delicious twist on classic kheer, made without refined sugar and packed with wholesome ingredients. Sweet ripe mangoes, creamy coconut milk, and nutrient-rich chia seeds come together to create a refreshing treat that's perfect for warm weather, family gatherings, or healthy snacking.


Unlike traditional rice-based kheer, this recipe requires no cooking of grains and can be prepared ahead of time, making it ideal for busy households. The natural sweetness from mangoes and dates provides plenty of flavor while keeping the dessert simple and nourishing.


Prep Time

15 Minutes


Chill Time

4 Hours


Total Time

4 Hours 15 Minutes


Servings

4–6


Ingredients


For the Kheer

  • 2 cups full-fat coconut milk
  • 3 tablespoons chia seeds
  • 2 ripe mangoes, peeled and diced
  • 4 Medjool dates, pitted
  • ½ teaspoon cardamom powder
  • 1 teaspoon rose water (optional)
  • 2 tablespoons unsweetened shredded coconut


For Garnishing

  • 1 small mango, finely diced
  • 2 tablespoons chopped pistachios
  • 2 tablespoons chopped almonds
  • 1 tablespoon shredded coconut
  • A few saffron strands (optional)
  • Fresh mint leaves for decoration


Instructions


Step 1: Prepare the Mango Mixture

Place 2 diced mangoes and the pitted dates into a blender.

Blend until smooth and creamy. Set aside.


Step 2: Mix the Kheer Base


In a large mixing bowl, combine:

  • Coconut milk
  • Chia seeds
  • Cardamom powder
  • Rose water (if using)
  • Shredded coconut


Whisk thoroughly to ensure the chia seeds are evenly distributed.


Step 3: Add Mango Puree

Fold the mango-date puree into the coconut milk mixture.

Mix until smooth and fully incorporated.


Step 4: Chill

Cover the bowl and refrigerate for at least 4 hours or overnight.

The chia seeds will absorb the liquid and create a rich, pudding-like texture similar to kheer.


Step 5: Stir and Adjust

After chilling, stir well.

If the mixture becomes too thick, add a small amount of coconut milk until the desired consistency is reached.


Step 6: Garnish and Serve

Divide the kheer into serving bowls or dessert glasses.


Top with:

  • Fresh diced mango
  • Chopped pistachios
  • Chopped almonds
  • Shredded coconut
  • Saffron strands


Serve chilled.


Serving Suggestions


This dessert is perfect for:

  • Summer gatherings
  • Family dinners
  • Festive celebrations
  • Weekend brunches
  • Healthy dessert cravings


It can also be served in small glasses for parties and special occasions.


Storage Tips

Store in an airtight container in the refrigerator for up to 3 days.

Stir before serving, as natural separation may occur.


For the freshest flavor, add garnishes just before serving.


Variations


Tropical Fruit Version

Add pineapple, papaya, or kiwi for a colorful tropical twist.


Nut Lover's Kheer

Increase almonds, pistachios, and cashews for extra crunch and richness.


Saffron Mango Kheer

Soak saffron strands in warm coconut milk and mix into the kheer before chilling.


Berry Fusion Version

Top with fresh strawberries or blueberries for a unique flavor combination.

Tap / Click to flip

Health Benefits of Key Ingredients


Mangoes

Mangoes provide natural sweetness and are rich in vitamins, antioxidants, and fiber.


Chia Seeds


Chia seeds contribute:

  • Plant-based protein
  • Fiber
  • Omega-3 fatty acids
  • Long-lasting satiety


Coconut Milk

Coconut milk creates a creamy texture while offering healthy fats and rich flavor.


Nuts

Almonds and pistachios add crunch, protein, and beneficial nutrients.


Why You'll Love This Recipe


  • No refined sugar
  • Naturally sweetened with fruit and dates
  • No rice required
  • Easy make-ahead dessert
  • Creamy and refreshing
  • Perfect for warm weather
  • Beautiful presentation for entertaining
  • Family-friendly and nutritious


Conclusion

This Mango Coconut Chia Kheer combines the comforting essence of traditional Indian desserts with wholesome modern ingredients. Its naturally sweet flavor, creamy texture, and vibrant mango taste make it a crowd-pleasing option for any occasion.


Whether you're hosting guests, looking for a healthier dessert, or simply wanting to enjoy seasonal mangoes in a new way, this easy no-refined-sugar recipe is sure to become a favorite in your kitchen.
← Tap / Click to go back
microblog image

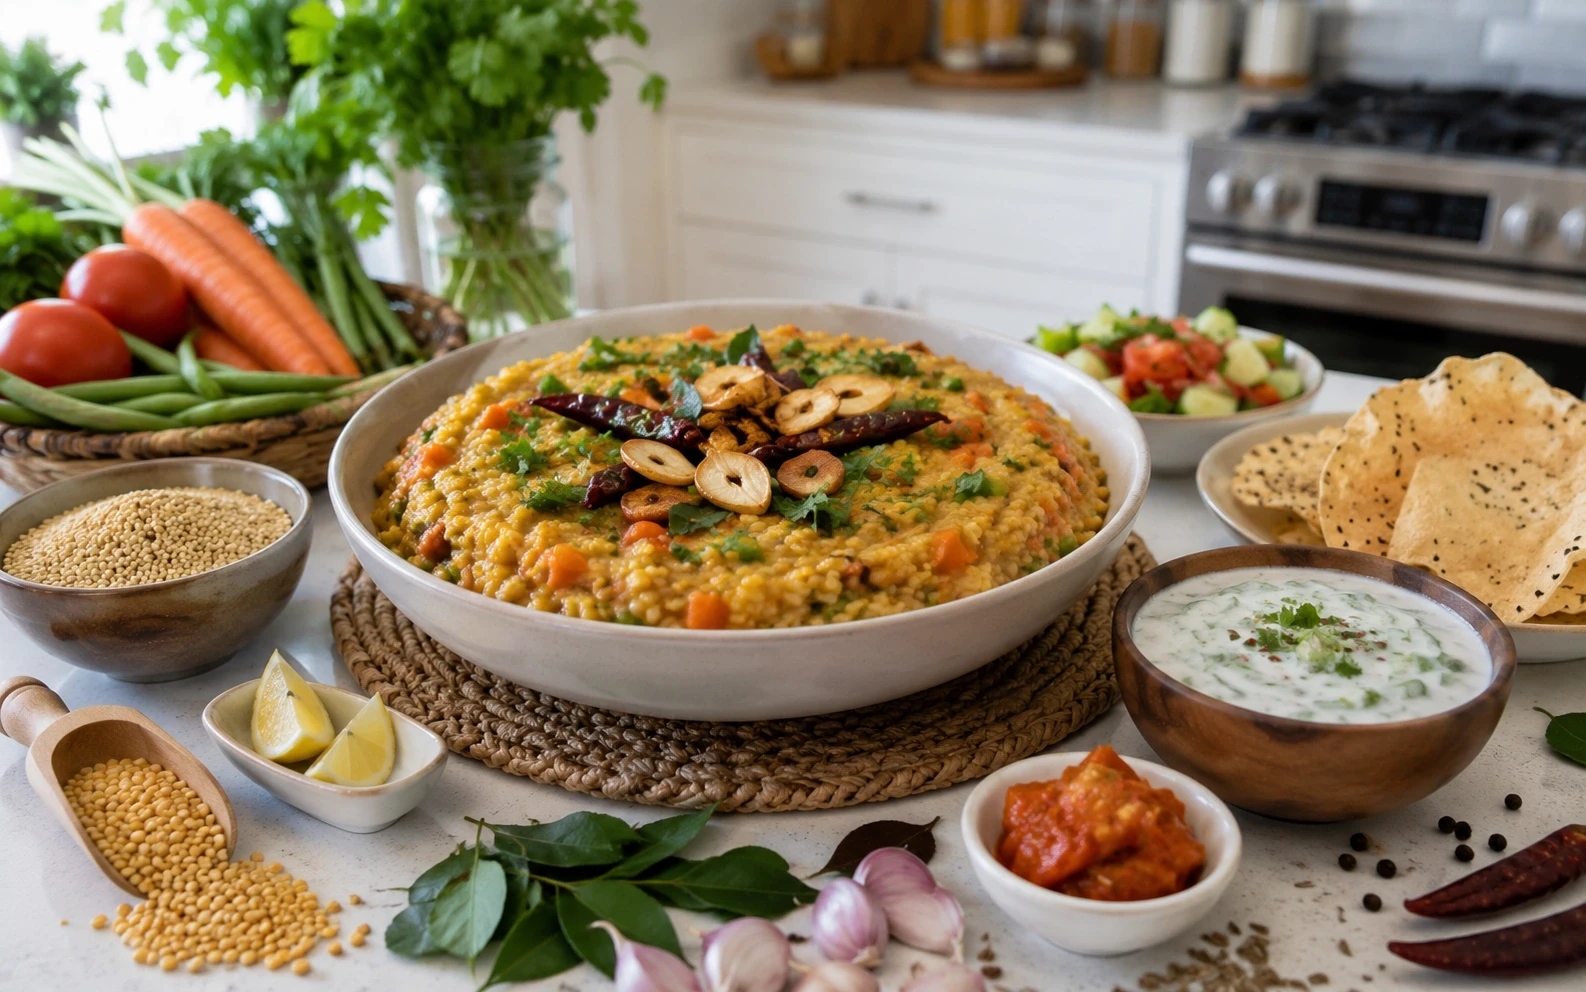
Vegetable Millet Khichdi with Roasted Garlic Tadka


A Nutritious One-Pot Meal Packed with Flavor and Wholesome Ingredients


If you're looking for a comforting, healthy, and easy-to-make meal, this Vegetable Millet Khichdi with Roasted Garlic Tadka is an excellent choice. Combining protein-rich lentils, nutrient-dense millets, fresh vegetables, and aromatic spices, this recipe offers a modern twist on a traditional Indian favorite.


Perfect for busy weeknights or wholesome family dinners, this khichdi is satisfying, flavorful, and packed with goodness.


Prep Time

15 Minutes


Cook Time

30 Minutes


Total Time

45 Minutes


Servings

4


Ingredients


For the Khichdi

  • 1 cup foxtail millet (or little millet)
  • ½ cup yellow moong dal
  • 1 medium onion, finely chopped
  • 1 medium carrot, diced
  • ½ cup green peas
  • ½ cup green beans, chopped
  • 1 medium tomato, chopped
  • 1 teaspoon grated ginger
  • 1 green chili, finely chopped
  • ½ teaspoon turmeric powder
  • 1 teaspoon cumin seeds
  • 1 tablespoon ghee or oil
  • 5 cups water
  • Salt to taste


For the Roasted Garlic Tadka

  • 1 tablespoon ghee
  • 8 garlic cloves, thinly sliced
  • 1 teaspoon cumin seeds
  • 2 dried red chilies
  • 8 curry leaves
  • ¼ teaspoon red chili powder


Garnish

  • Fresh cilantro, chopped
  • Lemon wedges


Instructions


Step 1: Wash and Soak

Rinse the millet and moong dal thoroughly under running water. Soak them together for about 15 minutes while preparing the vegetables.


Step 2: Sauté the Aromatics

Heat 1 tablespoon ghee in a pressure cooker or large pot. Add cumin seeds and allow them to crackle. Add onions and sauté until translucent.


Stir in ginger and green chili, cooking for another minute.


Step 3: Add Vegetables

Add carrots, peas, green beans, and tomatoes. Cook for 3–4 minutes until the vegetables begin to soften.


Mix in turmeric powder and salt.


Step 4: Cook the Khichdi

Drain the soaked millet and dal mixture and add it to the pot.


Pour in 5 cups of water and stir well.


If using a pressure cooker, cook for 3 whistles. If using a regular pot, cover and simmer for 25–30 minutes until the millet and dal become soft and creamy.


Step 5: Prepare the Roasted Garlic Tadka

Heat ghee in a small pan.


Add sliced garlic and roast on medium heat until golden brown and fragrant.

Add cumin seeds, dried red chilies, and curry leaves. Sauté briefly.


Turn off the heat and stir in red chili powder.


Step 6: Finish and Serve

Pour the roasted garlic tadka over the cooked khichdi.


Gently mix and garnish with fresh cilantro.


Serve hot with lemon wedges, yogurt, pickle, or papad.


Serving Suggestions


This khichdi pairs beautifully with:

  • Plain yogurt
  • Cucumber raita
  • Roasted papad
  • Mango pickle
  • Fresh salad


It also makes an excellent meal-prep option for lunches throughout the week.


Storage Tips

Store leftovers in an airtight container in the refrigerator for up to 3 days.


When reheating, add a splash of water to restore its creamy consistency.

Tap / Click to flip

Why You'll Love This Recipe


  • Rich in plant-based protein
  • Packed with vegetables
  • Naturally comforting and filling
  • Great for meal prep
  • Easy one-pot recipe
  • Family-friendly and nutritious
  • Uses wholesome millet instead of refined grains

Whether you're introducing more ancient grains into your diet or simply looking for a hearty homemade meal, this Vegetable Millet Khichdi with Roasted Garlic Tadka delivers comforting flavors and balanced nutrition in every bite.

← Tap / Click to go back
microblog image

Coconut Curry Vegetable Quinoa Khichdi


Traditional Indian comfort food can easily be transformed into a modern healthy meal with the addition of quinoa, fresh vegetables, coconut milk, and flavorful Indian spices. This Coconut Curry Vegetable Quinoa Khichdi combines nutrition, warmth, and authentic Indian flavor into one comforting bowl.


The recipe is rich in fiber, protein, vitamins, and minerals while remaining easy to digest and naturally satisfying. Coconut milk adds creamy texture while turmeric, cumin, ginger, and curry leaves create deep aromatic flavor.


Fresh grocery ingredients and authentic Indian pantry staples from Raunak Bazar help make this wholesome recipe both flavorful and nourishing.


Ingredients

  • 1 cup quinoa
  • ½ cup yellow moong dal
  • 1 small carrot chopped
  • ½ cup green peas
  • 1 small potato diced
  • 1 tomato chopped
  • 1 onion chopped
  • 1 tablespoon ginger grated
  • 2 garlic cloves minced
  • 1 teaspoon cumin seeds
  • 1 teaspoon turmeric powder
  • 1 teaspoon coriander powder
  • ½ teaspoon garam masala
  • 8 curry leaves
  • 1 green chili chopped
  • 1 cup coconut milk
  • 4 cups water
  • 1 tablespoon ghee or oil
  • Salt to taste
  • Fresh coriander for garnish


Instructions


Step 1: Wash the Ingredients


Rinse quinoa and moong dal thoroughly under water and set aside.


Step 2: Prepare the Tempering


Heat ghee or oil in a pressure cooker or deep pot. Add cumin seeds and curry leaves. Once aromatic, add onions, ginger, garlic, and green chili. Sauté until softened.


Step 3: Add Vegetables and Spices


Add carrots, peas, potatoes, and tomatoes. Stir in turmeric, coriander powder, garam masala, and salt. Cook for 2–3 minutes.


Step 4: Cook the Khichdi


Add quinoa and moong dal. Pour in coconut milk and water. Mix well.

Pressure cook for 3 whistles or simmer in a covered pot until soft and creamy.


Step 5: Garnish and Serve


Garnish with fresh coriander and serve hot with yogurt, pickle, or roasted papad.

Tap / Click to flip

Health Benefits

  • High in plant protein
  • Rich in fiber
  • Supports digestion
  • Comforting and easy to digest
  • Loaded with vegetables and nutrients
  • Balanced meal for lunch or dinner


Serving Suggestions


This khichdi pairs beautifully with:

  • cucumber raita
  • mint chutney
  • roasted papad
  • fresh salad
  • mango pickle


It also works wonderfully as a cozy rainy-day meal or a nourishing family dinner using wholesome grocery ingredients and authentic Indian spices.

← Tap / Click to go back
microblog image

Paneer Tikka Stuffed Multigrain Wrap


If you are looking for a healthy, flavorful, and filling meal that combines authentic Indian spices with wholesome ingredients, this Paneer Tikka Stuffed Multigrain Wrap is a perfect choice. Packed with marinated paneer, fresh vegetables, mint yogurt sauce, and multigrain rotis, this recipe delivers restaurant-style flavor while remaining light and nutritious.


Using fresh grocery ingredients and traditional Indian spices helps create a balanced meal that works well for lunch, dinner, or even meal prep. The smoky paneer tikka filling paired with crunchy vegetables and soft multigrain wraps creates a satisfying combination of texture and flavor.


At Raunak Bazar, shoppers can find fresh paneer, spices, vegetables, herbs, yogurt, and healthy grocery essentials needed to prepare this delicious homemade recipe.


Ingredients


For the Paneer Tikka Filling

  • 250 grams paneer cubes
  • 1 small onion sliced
  • 1 capsicum sliced
  • 1 tomato deseeded and sliced
  • ½ cup thick yogurt
  • 1 teaspoon ginger garlic paste
  • 1 teaspoon turmeric powder
  • 1 teaspoon cumin powder
  • 1 teaspoon coriander powder
  • 1 teaspoon garam masala
  • 1 teaspoon Kashmiri red chili powder
  • 1 tablespoon lemon juice
  • Salt to taste
  • 1 tablespoon oil


For the Mint Yogurt Sauce

  • ½ cup yogurt
  • Fresh mint leaves
  • Fresh coriander leaves
  • 1 green chili
  • Salt to taste


For Assembly

  • 4 multigrain rotis or wraps
  • Lettuce leaves
  • Sliced cucumber
  • Pickled onions
Tap / Click to flip

Instructions


Step 1: Marinate the Paneer


In a mixing bowl, combine yogurt, ginger garlic paste, turmeric, cumin powder, coriander powder, garam masala, chili powder, lemon juice, and salt. Add paneer cubes and vegetables. Mix well and let it marinate for at least 20 minutes.


Step 2: Cook the Filling


Heat oil in a pan and cook the marinated paneer and vegetables on medium heat until lightly charred and flavorful. Stir gently to avoid breaking the paneer.


Step 3: Prepare the Mint Sauce


Blend yogurt, mint leaves, coriander, green chili, and salt into a smooth sauce.


Step 4: Assemble the Wraps


Warm the multigrain rotis. Spread mint yogurt sauce over each wrap. Add lettuce, paneer tikka filling, cucumber slices, and pickled onions.


Step 5: Roll and Serve


Roll tightly and serve warm with extra mint sauce or masala tea.


Why You’ll Love This Recipe

  • High in protein
  • Rich in authentic Indian flavor
  • Perfect for quick homemade meals
  • Packed with fresh vegetables
  • Balanced and satisfying
  • Great for lunch boxes and family dinners
← Tap / Click to go back
microblog image

Spiced Chickpea & Spinach Curry


Ingredients:

●       1 cup boiled chickpeas

●       1 cup chopped spinach

●       1 onion (chopped)

●       2 tomatoes (pureed)

●       1 tsp ginger-garlic paste

●       1 tsp cumin seeds

●       ½ tsp turmeric

●       1 tsp garam masala

●       Salt to taste

●       Oil

Tap / Click to flip

Instructions:

  1. Heat oil and add cumin seeds.
  2. Add onion and sauté until golden.
  3. Mix ginger-garlic paste and tomato puree.
  4. Add spices and cook until oil separates.
  5. Add chickpeas and spinach.
  6. Simmer for 10 minutes and serve with rice or roti.


👉 A protein-rich, flavorful dish perfect for lunch or dinner.

← Tap / Click to go back
microblog image

Masala Vegetable Oats Upma


Ingredients:

●       1 cup oats

●       1 tbsp oil

●       1 tsp mustard seeds

●       1 chopped onion

●       1 chopped carrot

●       ½ cup peas

●       1 green chili (optional)

●       ½ tsp turmeric

●       Salt to taste

●       Fresh coriander

Tap / Click to flip

Instructions:

  1. Dry roast oats and keep aside.
  2. Heat oil, add mustard seeds, then onions and vegetables.
  3. Add turmeric, salt, and sauté well.
  4. Add 2 cups of water and bring to a boil.
  5. Mix oats and cook until soft.
  6. Garnish with coriander and serve hot.


👉 Healthy, quick breakfast option using everyday pantry items.

← Tap / Click to go back
microblog image

Paneer Tikka Masala Wrap

A flavorful wrap with grilled paneer, tikka spices, fresh veggies, and creamy yogurt sauce—perfect for a quick lunch or dinner.

Health Benefits:

Rich in protein from paneer, packed with vegetables, and balanced with yogurt for a nutritious and satisfying meal.

Tap / Click to flip

Ingredients

  • — Paneer Tikka Filling —
  • 200 g paneer (cubed)
  • 1 tbsp tikka masala paste
  • 1 tsp ginger-garlic paste
  • 1/2 tsp paprika
  • 1 tbsp oil
  • Salt to taste
  • — Vegetables —
  • 1/2 onion (sliced)
  • 1/2 bell pepper (sliced)
  • — Wrap & Sauce —
  • 4 whole wheat rotis or wraps
  • 1/2 cup yogurt
  • Fresh mint leaves

Instructions

  1. Marinade: Mix yogurt, tikka masala paste, paprika, ginger-garlic paste, and salt.
  2. Coat paneer cubes in the marinade and let rest for 15 minutes.
  3. Paneer: Heat oil in a pan and cook paneer until lightly grilled.
  4. Veggies: Sauté onions and bell peppers until slightly soft.
  5. Wrap: Place paneer and veggies on a warm roti.
  6. Add mint leaves and a spoon of yogurt sauce.
  7. Roll the wrap tightly and serve hot.
← Tap / Click to go back
microblog image

Masala Vegetable Poha Bowl

A quick and healthy breakfast made with flattened rice, vegetables, peanuts, and spices—light, filling, and ready in under 20 minutes.

Health Benefits:

Provides quick energy, fiber, and plant-based protein while being light, nutritious, and easy to digest.

Tap / Click to flip

Ingredients

  • — Main Ingredients —
  • 2 cups poha (flattened rice)
  • 1 small onion, finely chopped
  • 1 small potato, diced
  • 1/2 cup green peas
  • 2 tbsp peanuts
  • — Spices —
  • 1 green chili, chopped
  • 1 tsp mustard seeds
  • 1/2 tsp turmeric powder
  • 8–10 curry leaves
  • — Others —
  • 1 tbsp oil
  • Salt to taste
  • Juice of 1/2 lemon
  • Fresh coriander for garnish

Instructions

  1. Poha: Rinse poha gently in water and set aside for 3–4 minutes to soften.
  2. Tempering: Heat oil in a pan and add mustard seeds and curry leaves.
  3. Add peanuts and sauté until slightly roasted.
  4. Add onion, potato, and green peas; cook until soft.
  5. Add turmeric and salt, then mix in the softened poha.
  6. Cook for 2–3 minutes while stirring gently.
  7. Finish with lemon juice and garnish with coriander.
← Tap / Click to go back
microblog image

Rajma Masala with Steamed Jeera Rice

A comforting North Indian curry made with red kidney beans in a thick gravy, served with cumin-flavored rice.

Health Benefits:

Rajma is an excellent source of protein and fiber. Cumin aids digestion.

Tap / Click to flip

Ingredients

  • — Rajma —
  • 2 cups rajma (kidney beans) – soaked overnight
  • 2 onions (finely chopped)
  • 2 tomatoes (pureed)
  • 1 tbsp ginger-garlic paste
  • 1 tsp cumin seeds
  • 1 tsp turmeric
  • 2 tsp coriander powder
  • 1 tsp garam masala
  • Salt + oil
  • — Jeera Rice —
  • 2 cups basmati rice
  • 1 tsp cumin seeds
  • 2 tbsp ghee or oil
  • Water + salt

Instructions

  1. Rajma: Pressure cook soaked beans till soft.
  2. Masala: Heat oil, add cumin. Add onions and ginger-garlic paste. Add tomato puree, turmeric, coriander, and salt. Cook till oil separates.
  3. Add cooked rajma and water. Simmer for 20 mins. Add garam masala and simmer.
  4. Jeera Rice: Rinse rice. Heat ghee, add cumin. Add rice, water, and salt. Cook till fluffy.
  5. Serve hot with raita or salad.
← Tap / Click to go back
microblog image

Classic Masala Dosa with Coconut Chutney

A crispy South Indian fermented crepe filled with spiced potato masala, served with coconut chutney.

Health Benefits:

Fermented batter is good for gut health. Potatoes provide energy and potassium, while coconut offers healthy fats.

Tap / Click to flip

Ingredients

  • — Dosa Batter —
  • 2 cups raw rice
  • ½ cup urad dal
  • 1 tsp fenugreek seeds
  • Water as needed
  • Salt to taste
  • — Potato Masala —
  • 4 medium potatoes (boiled & mashed)
  • 1 large onion (thinly sliced)
  • 1 green chili (chopped)
  • ½ tsp mustard seeds
  • ½ tsp turmeric powder
  • Curry leaves
  • Salt + oil
  • — Coconut Chutney —
  • 1 cup grated coconut
  • 2 tbsp roasted chana dal
  • 1 green chili
  • ½ inch ginger
  • Water + salt
  • Temper: mustard seeds, curry leaves

Instructions

  1. Batter Preparation: Soak rice, urad dal & fenugreek for 20 minutes. Grind into smooth batter. Ferment overnight.
  2. Masala: Heat oil, add mustard seeds and curry leaves. Add onions, chili, turmeric. Mix mashed potatoes and salt. Cook 5 min.
  3. Coconut Chutney: Grind coconut, chana dal, chili, ginger, salt, water. Temper with mustard and curry leaves.
  4. Dosa: Heat tava. Pour ladle of batter. Spread thin. Drizzle oil. Cook till golden.
  5. Serve: Hot dosas with potato masala & chutney.
← Tap / Click to go back
microblog image

Spiced Paneer & Bell Pepper Stir-Fry with Toasted Sesame

A quick, protein-rich dry stir-fry with bold Indian spices, toasted sesame seeds, and fresh zesty lemon finish.

Health Benefits:

High in quality protein and calcium for strong bones. Rich in vitamin C and powerful antioxidants. Satisfying without being heavy or greasy.

Tap / Click to flip

Ingredients

  • — Main Ingredients —
  • 250 g paneer, cut into thin strips
  • 1 large bell pepper (any color), sliced
  • 1 small onion, thinly sliced
  • 1 tablespoon oil (groundnut or sunflower)
  • — Spice Blend —
  • ½ teaspoon cumin powder
  • ½ teaspoon coriander powder
  • ¼ teaspoon red chili powder (adjust to taste)
  • ½ teaspoon garam masala
  • Salt to taste
  • — Finishing Touch —
  • 1 tablespoon white sesame seeds
  • Juice of ½ lemon
  • Freshly chopped cilantro

Instructions

  1. Dry roast sesame seeds in a pan over low heat until lightly golden and aromatic. Remove and set aside.
  2. Heat oil in a wide pan. Add paneer strips and sauté on medium heat until lightly golden on the edges. Remove and keep aside.
  3. In the same pan, add sliced onions and sauté until just translucent. Add bell peppers and cook for 2–3 minutes. The vegetables should remain slightly crisp.
  4. Lower the heat and add cumin powder, coriander powder, chili powder, and salt. Mix quickly to avoid burning the spices.
  5. Return the paneer to the pan. Toss gently until everything is evenly coated with spices. Sprinkle garam masala and toasted sesame seeds.
  6. Turn off the heat. Add lemon juice and chopped cilantro. Toss once more before serving.
← Tap / Click to go back
microblog image

Golden Vegetable Khichdi with Tempered Ghee & Lemon

A comforting, nourishing one-pot meal with lightly toasted grains, fresh seasonal vegetables, and aromatic finishing tempering that adds depth.

Health Benefits:

Provides complete protein, fiber, and essential vitamins. Gentle on digestion and provides sustained balanced energy throughout the entire day.

Tap / Click to flip

Ingredients

  • — For the Khichdi Base —
  • ½ cup short-grain rice
  • ¼ cup split yellow moong dal (skinless)
  • 1 tablespoon ghee
  • ½ teaspoon cumin seeds
  • ½ teaspoon grated ginger
  • ½ teaspoon turmeric powder
  • 1 small carrot, finely diced
  • ½ cup chopped green beans
  • ½ cup chopped bottle gourd or zucchini
  • Salt to taste
  • 3½ cups water
  • — For the Finishing Tempering —
  • 1 tablespoon ghee
  • ¼ teaspoon mustard seeds
  • 1 dried red chili (broken)
  • 6–8 curry leaves
  • Pinch of asafoetida (hing)
  • — To Finish —
  • Fresh lemon juice
  • Chopped cilantro

Instructions

  1. Rinse the rice and dal separately until the water runs clear. Drain well.
  2. In a heavy-bottomed pot, heat 1 tablespoon ghee and lightly toast the rice and dal together for 2–3 minutes. This step adds a nutty aroma and prevents mushiness later.
  3. Add cumin seeds and let them crackle gently. Stir in grated ginger and turmeric. Add the chopped vegetables and sauté for 2 minutes until lightly softened.
  4. Add water and salt. Bring to a gentle boil, then reduce heat, cover, and simmer for 18–22 minutes. Stir once halfway through to prevent sticking. The texture should be creamy but still structured—not soupy.
  5. In a small pan, heat ghee. Add mustard seeds, dried red chili, curry leaves, and hing. Let everything sizzle for a few seconds until fragrant.
  6. Pour the hot tempering over the khichdi. Stir gently, squeeze fresh lemon juice, and garnish with cilantro.
← Tap / Click to go back
microblog image

Spiced Amla Jaggery Chutney & Roasted Vegetable Bajra Tikki

Immunity-boosting amla-jaggery chutney paired with fiber-rich bajra tikkis loaded with winter veggies for a warming snack.

Health Benefits:

Amla delivers vitamin C and antioxidants; jaggery adds iron and warmth; bajra offers fiber and complex carbs; winter veggies add vitamins and phytonutrients.

Tap / Click to flip

Ingredients

  • — Bajra Tikki —
  • 1 cup bajra (pearl millet) flour
  • ½ cup boiled and mashed sweet potato
  • ½ cup grated carrot
  • ¼ cup finely chopped spinach or methi
  • 1 small onion, finely chopped
  • 1 tsp roasted cumin powder
  • ½ tsp garam masala
  • ½ tsp red chili powder
  • ½ tsp black salt
  • Salt to taste
  • 2–3 tbsp oil (for shallow roasting)
  • Warm water, as needed to bind
  • — Spiced Amla Jaggery Chutney —
  • 6–8 fresh amla, deseeded and finely chopped
  • ½–¾ cup grated jaggery
  • 1 tsp roasted cumin powder
  • ½ tsp red chili powder
  • A pinch of black salt
  • 1 tbsp lemon juice
  • Warm water, as needed for consistency

Instructions

  1. Chutney: Lightly sauté chopped amla with a splash of water until slightly softened; cool. Mix with grated jaggery, roasted cumin, red chili, black salt, and lemon juice. Add warm water as needed for a spoonable chutney; balance sweetness and tang.
  2. Tikki dough: In a bowl combine bajra flour, mashed sweet potato, grated carrot, spinach/methi, onion, roasted cumin powder, garam masala, red chili powder, black salt, and salt. Add warm water gradually to bind into a soft, firm dough. Rest 10 minutes.
  3. Shape & cook: Divide into golf-ball portions, flatten into tikkis. Shallow roast in a lightly oiled pan 3–4 minutes per side until golden and crisp.
  4. Serve: Pair hot bajra tikkis with the spiced amla jaggery chutney. Also great with curd or mint-coriander chutney.
← Tap / Click to go back
microblog image

Winter Millet & Root Vegetable Khichdi with Spiced Citrus Raita

One-pot winter millet khichdi with roots and greens, paired with a bright citrus raita for warmth, immunity, and balance.

Health Benefits:

Millets and moong provide steady energy and protein; roots add fiber and antioxidants; citrus raita boosts vitamin C and aids digestion.

Tap / Click to flip

Ingredients

  • — Khichdi —
  • 1 cup mixed millets (foxtail/little/pearl), rinsed
  • ½ cup yellow moong dal
  • 1 small carrot, diced
  • 1 small radish, cubed
  • ½ cup sweet potato, cubed
  • ½ cup spinach or mustard greens, chopped
  • 1 small onion, finely sliced
  • 2–3 cloves garlic, minced
  • 1 tsp grated ginger
  • ½ tsp turmeric powder
  • 1 tsp cumin seeds
  • ½ tsp black pepper
  • 1–2 green chilies (optional)
  • Salt to taste
  • 2 tbsp ghee or oil
  • 4 cups water
  • — Spiced Citrus Raita —
  • 1 cup plain yogurt
  • ½ small orange, segmented and chopped
  • ¼ small sweet lime, peeled and chopped
  • A pinch of roasted cumin powder
  • A pinch of black salt
  • Fresh cilantro, chopped
  • Salt to taste

Instructions

  1. Rinse millets and moong dal until water runs clear; soak 15–20 minutes if possible.
  2. Heat ghee/oil; crackle cumin. Add garlic, ginger, and sliced onion; sauté until translucent.
  3. Add carrot, radish, sweet potato; stir 2–3 minutes to soften slightly.
  4. Mix in turmeric, black pepper, salt, and drained millet/dal; toast 2 minutes.
  5. Pour 4 cups water, adjust salt, bring to boil; cover and simmer 20–25 minutes until grains and veggies are tender, adding hot water if needed for a creamy texture.
  6. Fold in chopped greens; cover off-heat to wilt. Finish with a pinch of black pepper.
  7. For raita: whisk yogurt smooth, fold in orange and sweet lime, roasted cumin, black salt, salt, and cilantro. Serve khichdi hot with the citrus raita.
← Tap / Click to go back
microblog image

Creamy Coconut-Lime Millet Bowl

Creamy millet bowl with coconut milk, spinach, carrot, and lime, topped with peanuts and coriander for a nutritious meal.

Health Benefits:

Millet adds fiber and carbs, spinach provides iron, coconut milk healthy fats, and peanuts protein and crunch.

Tap / Click to flip

Ingredients

  • 1 cup foxtail millet (or any millet variety), rinsed
  • 2 cups water
  • ½ cup coconut milk
  • ½ cup finely chopped spinach
  • 1 small carrot, grated
  • 1 tbsp coconut oil or light olive oil
  • ½ tsp mustard seeds
  • 6–8 curry leaves
  • 1 green chili, slit (optional)
  • 1 tsp grated ginger
  • ¼ tsp turmeric powder
  • Juice of ½ lime
  • Salt to taste
  • Fresh coriander & roasted peanuts (for garnish)

Instructions

  1. Cook the millet: In a saucepan, add millet and 2 cups of water with a pinch of salt. Bring to a boil, then cover and simmer until soft (about 15 minutes). Fluff gently with a fork.
  2. Prepare the tempering: Heat coconut oil in a pan. Add mustard seeds; once they pop, add curry leaves, green chili, and ginger. Sauté for 30 seconds.
  3. Add veggies: Stir in turmeric, grated carrot, and chopped spinach. Cook 2–3 minutes until wilted.
  4. Creamy base: Pour in the coconut milk and bring the mixture to a gentle simmer. Add cooked millet and stir until everything is evenly coated and creamy.
  5. Finish & serve: Turn off heat, squeeze fresh lime juice over the mixture, and garnish with roasted peanuts and coriander.
← Tap / Click to go back
microblog image

Spiced Jackfruit & Paneer Kebab Wraps

Plant-based jackfruit and paneer wraps with mint-yoghurt drizzle and fresh salad, perfect as a light, protein-rich snack.

Health Benefits:

Jackfruit adds fiber, paneer provides protein and calcium, and herbs aid digestion and immunity.

Tap / Click to flip

Ingredients

  • 250 g firm paneer (Indian cottage cheese), cut into 1-inch cubes
  • 1 cup young green jackfruit (canned or fresh), shredded
  • 1 tbsp oil
  • ½ tsp turmeric powder
  • 1 tsp coriander powder
  • ½ tsp garam masala
  • 1 tsp chaat masala
  • Salt to taste
  • 4 large whole-wheat wraps or roti-style flatbreads
  • — For the mint-yoghurt drizzle —
  • ½ cup plain yoghurt
  • ¼ cup fresh mint leaves, chopped
  • 1 small garlic clove, minced
  • Juice of half a lemon
  • Salt & pepper to taste
  • Fresh salad fill-in: sliced cucumber, red onion rings, shredded lettuce

Instructions

  1. In a mixing bowl, toss together the paneer cubes and shredded jackfruit with turmeric, coriander powder, garam masala, salt and oil. Let it marinate for about 10 minutes.
  2. Heat a non-stick skillet over medium heat. Add the marinated mixture and sauté for about 6-8 minutes until the jackfruit softens and paneer edges turn golden.
  3. Meanwhile, prepare the mint-yoghurt drizzle: in a small bowl mix yoghurt, chopped mint, garlic, lemon juice, salt and pepper until smooth.
  4. Warm the wraps lightly on a separate pan (or microwave) so they become pliable.
  5. Lay each wrap flat, place a portion of the paneer-jackfruit mixture down the centre, add cucumber, red onion rings and shredded lettuce, then drizzle generously with the mint-yoghurt mix.
  6. Fold or roll up the wrap tightly. Serve immediately, or wrap in parchment for a to-go option.
← Tap / Click to go back
microblog image

Sweet Corn & Spinach Pancakes with Mint Yogurt Dip

Savory pancakes with corn, spinach, and spices, served with a refreshing mint yogurt dip — perfect for breakfast or snacks.

Health Benefits:

Corn adds fiber, spinach boosts iron, yogurt aids gut health, and cumin supports digestion.

Tap / Click to flip

Ingredients

  • — For the Pancakes —
  • 1 cup whole wheat flour (or multigrain flour)
  • ½ cup corn kernels (fresh or frozen, thawed)
  • 1 cup finely chopped spinach
  • 1 small onion, finely chopped
  • 1 green chili, finely chopped (optional)
  • ½ tsp cumin powder
  • ½ tsp roasted cumin seeds (crushed)
  • Salt to taste
  • ¾ – 1 cup water (adjust consistency)
  • Oil for cooking
  • — For the Mint Yogurt Dip —
  • 1 cup plain yogurt
  • ⅓ cup fresh mint leaves
  • 1 small garlic clove
  • ½ tsp roasted cumin powder
  • Salt & pepper to taste
  • Water, as needed to adjust consistency

Instructions

  1. In a mixing bowl, combine flour, corn kernels, spinach, onion, green chili, cumin powder, crushed roasted cumin, and salt.
  2. Gradually add water to form a pourable but thick batter, similar to pancake consistency.
  3. Heat a non-stick skillet or griddle over medium heat and lightly grease with oil.
  4. Pour about ¼ cup batter per pancake, spread slightly, and cook 2–3 minutes until bubbles form. Flip and cook another 2 minutes until golden brown.
  5. Repeat with the remaining batter.
  6. For the dip, blend yogurt, mint leaves, garlic, roasted cumin, salt, and pepper until smooth. Add water as needed to adjust thickness.
  7. Serve pancakes stacked or side by side with the mint yogurt dip.
← Tap / Click to go back
microblog image

Millet & Chickpea One-Pot Stew

A hearty and protein-rich one-pot stew combining pearl millet and chickpeas with vibrant vegetables and warm spices, perfect for a wholesome dinner.

Health Benefits:

Millet adds fiber and minerals, chickpeas give plant protein, and spices boost digestion and immunity.

Tap / Click to flip

Ingredients

  • 1 cup pearl millet (bajra), rinsed
  • ½ cup chickpeas (dry, soaked overnight or canned)
  • 1 medium onion, chopped
  • 2 cloves garlic, minced
  • 1-inch piece ginger, grated
  • 1 tomato, chopped
  • 1 carrot, diced
  • ½ cup zucchini, diced
  • 1 tsp cumin seeds
  • ½ tsp mustard seeds
  • ½ tsp turmeric powder
  • 1 tsp coriander powder
  • ¼ tsp red chili powder (adjust to taste)
  • 4 cups vegetable broth or water
  • Salt to taste
  • 1 tbsp oil or ghee
  • Fresh coriander leaves, chopped (for garnish)

Instructions

  1. If using dried chickpeas, soak overnight and pressure cook until soft (10–12 minutes). If using canned chickpeas, rinse and drain.
  2. Heat oil in a large pot over medium heat. Add mustard and cumin seeds; once they sputter, add onions, garlic, and ginger. Sauté until onions soften.
  3. Add chopped tomato, carrot, and zucchini. Stir for a minute, then mix in turmeric, coriander powder, red chili powder, and salt.
  4. Add rinsed millet and chickpeas. Pour in vegetable broth or water and stir to combine.
  5. Bring to a boil, reduce heat to low, cover, and cook for 15–18 minutes or until millet is tender and liquid absorbed. Add water if too thick.
  6. Garnish with fresh coriander leaves and serve hot with lemon or cucumber-yogurt raita.
← Tap / Click to go back
microblog image

Tulsi-Cumin Herbal Tea (Stress-Relief Elixir)

Tulsi and cumin calm the nervous system, improve digestion, and help balance stress hormones naturally.

Health Benefits:

Its antioxidant-rich blend supports respiratory health, balances metabolism, and promotes a sense of calm and relaxation.

Tap / Click to flip

Ingredients

  • 5–6 fresh tulsi leaves (or 1 tsp dried)
  • ½ tsp cumin seeds
  • 1 slice ginger (optional)
  • 2 cups water
  • Honey or jaggery (optional)

Instructions

  1. Boil water in a pot. Add tulsi, cumin, and ginger.
  2. Simmer for 5–7 minutes until aromatic.
  3. Strain into a cup and sweeten if desired.
  4. Sip warm in the morning or evening to unwind.
← Tap / Click to go back
microblog image

Moringa Leaf Stir-Fry (Drumstick Greens Poriyal)

Moringa leaves are rich in iron, calcium, and antioxidants, ideal for boosting energy and supporting brain health

Health Benefits:

It helps regulate blood sugar, supports digestion, and promotes healthy skin and hair.

Tap / Click to flip

Ingredients

  • 1 cup fresh moringa leaves (cleaned and stems removed)
  • 1 tsp oil or ghee
  • ½ tsp mustard seeds
  • 1 dry red chili
  • 1 tsp urad dal (optional)
  • 1 pinch asafoetida (hing)
  • Salt to taste
  • 2 tbsp grated coconut (optional)

Instructions

  1. Heat oil or ghee in a pan. Add mustard seeds, chili, urad dal, and hing.
  2. Add moringa leaves and sauté on medium heat for 5–7 minutes until tender.
  3. Sprinkle salt and finish with grated coconut.
  4. Serve with hot rice or as a side to roti.
← Tap / Click to go back
microblog image

Golden Turmeric Milk (Haldi Doodh)

Known as a healing tonic in Indian households, this drink reduces inflammation, aids sleep, and boosts brain function.

Health Benefits:

Amla chutney supports immunity, aids digestion, and promotes glowing skin due to its high Vitamin C.

Tap / Click to flip

Ingredients

  • 1 cup milk (dairy or plant-based)
  • ½ tsp turmeric powder
  • 1 pinch black pepper
  • ½ tsp ghee (optional)
  • ¼ tsp cinnamon (optional)
  • Honey or jaggery to taste

Instructions

  1. Warm milk in a saucepan.
  2. Stir in turmeric, black pepper, ghee, and cinnamon.
  3. Let it simmer for 2–3 minutes. Turn off the heat.
  4. Add honey or jaggery just before drinking.
  5. Sip warm before bedtime.
← Tap / Click to go back
microblog image

Amla Chutney (Vitamin C Booster)

Amla is rich in antioxidants and immunity-boosting Vitamin C, this chutney adds a zesty punch to any meal.

Health Benefits:

Amla chutney supports immunity, aids digestion, and promotes glowing skin due to its high Vitamin C.

Tap / Click to flip

Ingredients

  • 4–5 fresh amlas (deseeded and chopped)
  • 1 tbsp fresh coriander leaves
  • 1 green chili (adjust to taste)
  • • ½ tsp roasted cumin powder
  • • Salt to taste
  • • A pinch of black salt
  • • 1 tsp jaggery (optional for balance)

Instructions

  1. Blend all ingredients together with a little water to form a coarse paste.
  2. Store in a glass jar and refrigerate for up to 4 days.
  3. Serve with rice, paratha, or dal for a nutritional upgrade.
← Tap / Click to go back
microblog image

Moong Dal Khichdi with Ghee and Spinach

Easy to digest, gut-friendly, rich in protein, iron, and fiber, perfect for detox, energy, or comfort food.

Health Benefits:

Moong Dal Khichdi with Ghee and Spinach is a light, nutritious meal rich in protein, fiber, and essential vitamins.

Tap / Click to flip

Ingredients

  • ½ cup yellow moong dal (washed)
  • ½ cup rice or millet
  • 1 tbsp ghee
  • 1 tsp cumin seeds
  • ½ tsp turmeric
  • 1 cup chopped spinach
  • Salt to taste
  • 1 tsp grated ginger

Instructions

  1. Wash dal and rice together. Soak for 15 minutes.
  2. In a pressure cooker or pot, heat ghee. Add cumin seeds and ginger.
  3. Add turmeric and sauté spinach lightly.
  4. Add soaked dal and rice, and 3 cups of water. Add salt.
  5. Pressure cook for 2–3 whistles or cook covered until soft.
  6. Serve hot with a dollop of ghee and a side of curd.
← Tap / Click to go back
microblog image

Bajra Khichu (Pearl Millet Steamed Snack)

A Gujarati steamed delight that's light and filling.

Health Benefits:

Bajra is rich in iron and fiber, improves digestion, and is gluten-free.

Tap / Click to flip

Ingredients

  • 1 cup bajra (pearl millet) flour
  • 1 tsp ajwain (carom seeds)
  • 1 tsp green chili paste
  • 1 tbsp oil
  • Salt to taste
  • 2 cups water

Instructions

  1. Boil water with salt, oil, and ajwain.
  2. Add bajra flour and chili paste, stir quickly to avoid lumps.
  3. Cover and cook for 5–7 minutes.
  4. Serve warm with a drizzle of oil or pickle.
← Tap / Click to go back
microblog image

Carrot & Coconut Ladoo

A no-cook sweet made with natural ingredients.

Health Benefits:

Carrots are rich in Vitamin A, dates provide natural energy, and coconut gives healthy fats.

Tap / Click to flip

Ingredients

  • 1 cup grated carrot
  • ½ cup desiccated coconut
  • 5–6 dates (pitted)
  • 2 tbsp roasted sesame seeds
  • ½ tsp cardamom powder
  • 1 tsp ghee

Instructions

  1. Blend dates into a paste.
  2. In a pan, dry roast grated carrot until slightly soft.
  3. Mix with dates, coconut, sesame seeds, and cardamom.
  4. Add a little ghee, roll into small ladoos.
  5. Store in an airtight box.
← Tap / Click to go back
microblog image

Sprouted Moong Salad with Lemon Dressing

A crunchy, refreshing salad packed with plant protein.

Health Benefits:

Sprouts are high in protein and enzymes. Lemon enhances Vitamin C absorption, and raw veggies add fiber.

Tap / Click to flip

Ingredients

  • 1 cup sprouted green moong
  • ½ cucumber (chopped)
  • 1 tomato (chopped)
  • 1 small onion (finely chopped)
  • 1 green chili (optional)
  • Juice of 1 lemon
  • Salt & black pepper to taste
  • Fresh coriander leaves

Instructions

  1. Rinse sprouts and steam lightly (optional for easy digestion).
  2. Mix sprouts with cucumber, tomato, onion, and chili.
  3. Add lemon juice, salt, and pepper. Toss well.
  4. Garnish with coriander and serve fresh.
← Tap / Click to go back
microblog image

Pumpkin Sabzi with Fenugreek Seeds

A sweet-sour North Indian-style curry perfect with roti or puri.

Health Benefits:

Pumpkin is rich in Vitamin A and antioxidants. Fenugreek aids digestion, and jaggery provides iron and natural sweetness.

Tap / Click to flip

Ingredients

  • 2 cups pumpkin (peeled & diced)
  • 1 tsp fenugreek seeds
  • 1 tsp fennel seeds
  • 1 green chili (slit)
  • 1 tbsp jaggery
  • ½ tsp turmeric powder
  • 1 tbsp oil
  • Salt to taste

Instructions

  1. Heat oil in a kadhai, add fenugreek and fennel seeds.
  2. Add pumpkin, turmeric, and green chili. Sauté for 5 minutes.
  3. Add ½ cup water, cover, and cook until pumpkin is tender.
  4. Stir in jaggery and salt, cook for 2 more minutes.
  5. Serve warm with chapati.
← Tap / Click to go back
microblog image

Drumstick Sambar with Tamarind

A tangy, protein-packed South Indian favorite.

Health Benefits:

Drumsticks (moringa pods) are rich in Vitamin C and iron. Toor dal gives protein, while tamarind aids digestion.

Tap / Click to flip

Ingredients

  • ½ cup toor dal (pigeon peas)
  • 2 drumsticks (cut into pieces)
  • 1 medium onion (sliced)
  • 1 tomato (chopped)
  • 1 tbsp sambar powder
  • 1 tbsp tamarind pulp
  • 1 tsp mustard seeds
  • 8 curry leaves
  • 1 dry red chili
  • 1 tbsp oil
  • Salt to taste

Instructions

  1. Pressure cook dal with turmeric until soft, mash well.
  2. Boil drumsticks with onion, tomato, and tamarind pulp.
  3. Add cooked dal and sambar powder, simmer 10 minutes.
  4. Temper mustard, curry leaves, and chili in oil; pour into sambar.
  5. Serve with steamed rice or idli.
← Tap / Click to go back
microblog image

Kashmiri Nadru Yakhni (Lotus Stem Curry)

A Kashmiri specialty with a yogurt-based gravy and unique texture.

Health Benefits:

Lotus stem is rich in calcium and fiber, curd supports gut health, and fennel aids digestion.

Tap / Click to flip

Ingredients

  • 200g lotus stem (cleaned & sliced)
  • 1 cup curd (whisked)
  • 1 tsp fennel powder
  • ½ tsp dry ginger powder
  • ½ tsp cumin seeds
  • 2 green cardamoms
  • 1 bay leaf
  • 1 tsp ghee
  • Salt to taste
  • 2 cups water

Instructions

  1. Boil lotus stem slices until tender.
  2. Heat ghee, add cumin, bay leaf, and cardamoms.
  3. Stir in fennel and dry ginger powder.
  4. Add whisked curd and stir quickly to avoid curdling.
  5. Mix in lotus stem, salt, and simmer for 10 minutes.
  6. Serve with steamed rice.
← Tap / Click to go back
microblog image

Millet Upma with Vegetables

A light, fiber-packed breakfast that keeps you full.

Health Benefits:

Millet is diabetic-friendly, gluten-free, and rich in fiber. Vegetables add vitamins, minerals, and antioxidants.

Tap / Click to flip

Ingredients

  • 1 cup foxtail millet (washed & soaked 30 min)
  • 1 onion (chopped)
  • ½ cup carrots, beans, peas (chopped)
  • 1 tsp mustard seeds
  • 1 tsp urad dal
  • 1 dry red chili
  • 8 curry leaves
  • 2 tsp oil or ghee
  • Salt to taste
  • 3 cups water

Instructions

  1. Heat oil, add mustard, urad dal, chili, and curry leaves.
  2. Add onion and sauté until soft.
  3. Mix in vegetables and stir-fry.
  4. Add millet, salt, and water. Cover and cook until millet is fluffy.
  5. Serve hot.
← Tap / Click to go back
microblog image

Sweet Potato & Carrot Soup with Curry Leaves

Creamy and comforting, full of antioxidants and natural sweetness.

Health Benefits:

Sweet potatoes are rich in Vitamin A, carrots improve eye health, and curry leaves aid digestion. Coconut milk provides healthy fats.

Tap / Click to flip

Ingredients

  • 1 cup sweet potato (peeled & chopped)
  • 1 cup carrots (chopped)
  • 1 small onion (sliced)
  • 1 tsp ginger-garlic paste
  • 1 tsp curry leaves
  • 1 tbsp coconut milk
  • 1 tsp olive oil or ghee
  • Salt & pepper to taste
  • 3 cups water

Instructions

  1. Heat oil in a pot, sauté onion and ginger-garlic paste.
  2. Add sweet potato, carrot, curry leaves, and water. Cook until soft.
  3. Blend into a smooth puree.
  4. Stir in coconut milk, salt, and pepper.
  5. Serve warm.
← Tap / Click to go back
microblog image

Quinoa Pongal with Black Pepper

A wholesome twist on ven pongal, using quinoa for extra nutrition.

Health Benefits:

Quinoa is gluten-free and protein-rich, while moong dal aids digestion. Black pepper boosts metabolism, and ghee supports gut health.

Tap / Click to flip

Ingredients

  • ½ cup quinoa (washed)
  • ½ cup yellow moong dal
  • 1 tsp black pepper (coarsely crushed)
  • 1 tsp cumin seeds
  • 1 tbsp ghee
  • 1 tsp grated ginger
  • 8–10 curry leaves
  • Salt to taste
  • 3 cups water

Instructions

  1. Wash quinoa and moong dal together.
  2. Pressure cook with 3 cups water, salt, and turmeric until soft.
  3. Heat ghee, add cumin, black pepper, curry leaves, and ginger.
  4. Pour over the quinoa-dal mix and stir well.
  5. Serve hot with coconut chutney or sambar.
← Tap / Click to go back